


Part 2 How to make the stem.

Again, in the spirit of reusing and repurposing I used an old valance to make the stem. You can use any velvet-like material.

You will also need some paper stem wire, I purchased a package from Joann Fabrics for $1.99.

Cut out a strip 20 inches long by 2 inches wide. The strip should be a few inches longer than the wire insert.

Fold over {velvet facing in} and pin to make sewing easier.

Sew the length of the strip and sew closed one end.

Turn the material right side out. This is the most challenging, since there isn't a lot of room to work with. I used a safety pin but it still proved challenging.

Initially I thought one wire would fit snug and secure inside the stem but instead I needed 2. I braided two pieces of wire together. Depending on how wide your stem is, you may need to fill it with more than 1 wire or even stuff it with some pipe cleaners.

Insert wire(s) into the stem.

Using this pattern, cut out 2 leaves from the same green velvet-like material.

Sew them together, leaving an opening to turn the right side out.

Using some green thread and a needle...

embroider veins to each of the leaves. The same effect could be achieved with your sewing machine. I didn't have green thread for my sewing machine so I had to embroider my veins.

Attach the smaller leaf to the back of the flower using your green thread and needle. I placed the bottom of my leaf roughly in the center of the flower, leaving the top of my leaf peaking out a side of the rose. Take care to sew it down cleanly trying to hide your stitches as you go.

When you have attached the smaller leaf, your rose should look like this...

Next, begin to give some shape and form to the stem. Start by tightly rolling up the very end of the stem. Roll the end approximately 2 or 3 times. You should get a result that looks like this...

Now to add some shape to the middle of stem. While resting your index finger on the middle of the stem, wrap the stem around your finger 2 times. Depending on how pliable your wire inserts are, you may need to adjust these twists to achieve the desired shape.

As you may have learned from sewing both your rose and the stem, this material shifts and moves. When you get the shape of your stem, pull the material up, like you were pulling up a pair of socks, so any slack or excess material is pulled up to the top. You will have extra material that goes beyond the wire insert.
Determine where you want to sew your larger leaf. Turn the raw edge of the leaf inside the body of the leaf. Using a needle and green thread, cleanly and securely attach the leaf to the stem. You should be able to do this by inserting your needle at the edge of the leaf pulling it through the stem and back to the opposite edge. You'll want to secure the middle of the leaf as well. Try and hide your stitches, using a velvet-like material, this should be easier than you might imagine.

When your leaf is securely attached, it should look like this...

The top of the stem should have a few inches of excess material. You'll want to use the excess to create a bud-like shape for your rose to blossom from {or rest on top of}. Wrap the excess material around the top of the stem. If need be, you can build up the bud by cut an extra strip of fabric, no more than 1/2 an inch in width, you will not need to sew this piece, simply fold it over, velvet sides facing out, and continue to wrap the top of the stem. Using your needle and green thread, do a few stitches to secure the bud in place. As you can see, the top of my stem is not perfect BUT it will be covered when attached to the bottom of the rose.

Place the top of the stem, with all the ugly raw edges directly against the bottom of the flower. Rough placement should be centered on the bottom of the flower, covering the end of the leaf.

You'll want to make sure you securely sew the stem to the flower. With your needle and green thread, sew around where the top of the bud meets the rose. As you attach it, you can shift your flower with the tightness and location of your stitches in order to have it face to a side or straight up. My rose faces to the side. Again, this is really what you think looks best.

When the stem is securely attached to the flower...

you have successfully completed the 'A Rose Is A Rose Tutorial'.
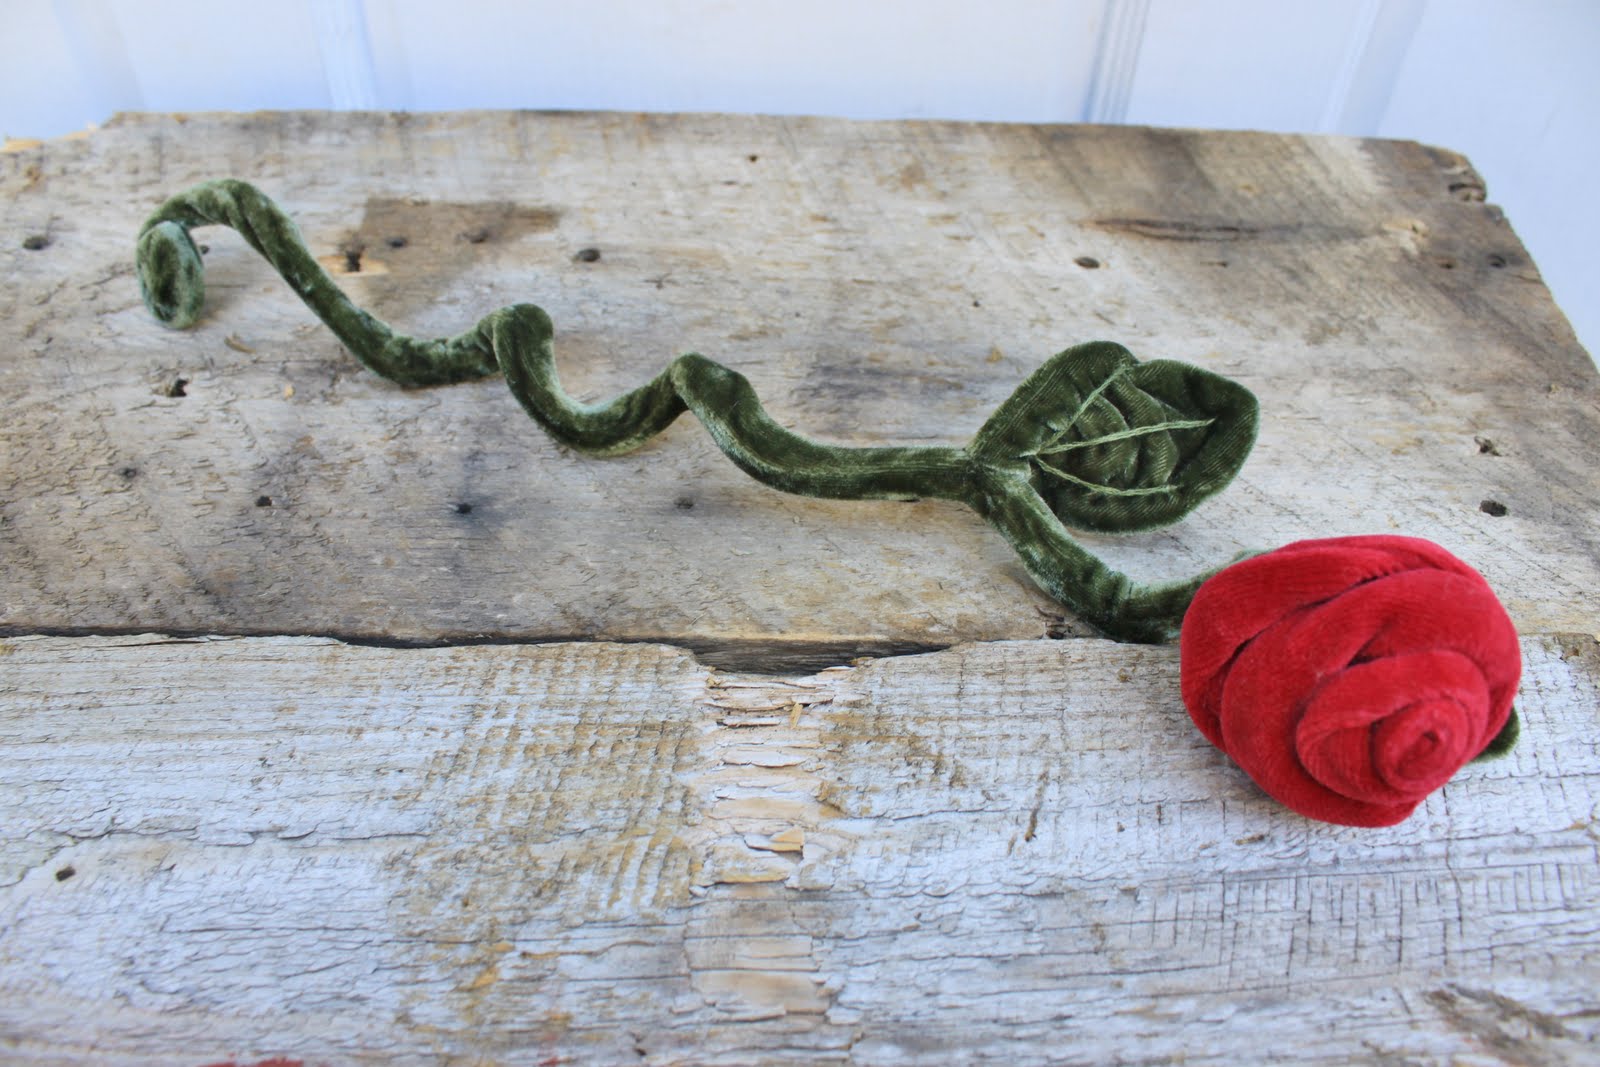
Find a spot to your show off your rose...

and admire.

As promised, this is a rose for any season {no green thumb required}.

Total cost for this rose:
$1.49 for the Goodwill Christmas outfit I turned into the bud of the rose
$1.99 for the floral stem wire
$0 for the old valance I already had
So, for under $5, I have a one of a kind rose.

©2011. For personal use only. Please do not use this tutorial for distribution or resale purposes. You are welcome to link back to this site. All borrowed content must be given proper credit. This is the intellectual property of While Wearing Heels.
Wow, this looks great! Liz
ReplyDelete